
The fastest way to get lost in a capable platform is to configure everything before doing anything. For a first session, resist that pull.
Choose one question you can answer today: Can this learner match identical pictures independently? Does a vocal response appear after a model fades? Can we collect a five-minute rate we can act on?
The rest of the setup should serve that question.
1. Choose the workspace that matches your role
The Family plan is a guided home experience for one child. Practicing Instructors usually need the Professional workspace for multiple learners, pathways and analytics. Researcher and Institution plans add controls for larger or more specialized work. Current limits and prices belong on the pricing page, where they can stay up to date.
2. Create a learner profile with only useful information
Go to Students → Add Student. Use a recognizable name or local identifier and record preferences that affect the session: celebration style, access needs, response mode and other relevant conditions. A field should earn its place by changing what you do.
Do not turn the profile into a diagnosis summary. Interlaza organizes teaching and measurement; it does not need every fact about a child to show the next activity.
3. Pick the shortest route that still makes sense
Start with what your question actually depends on. If you want to examine non-identical matching, identity matching is a useful check to run first, not a prerequisite the app enforces — the same question can sometimes be asked directly. If the goal is verbal behavior, choose an off-tablet activity with the vocal prompt hierarchy built for spoken targets.
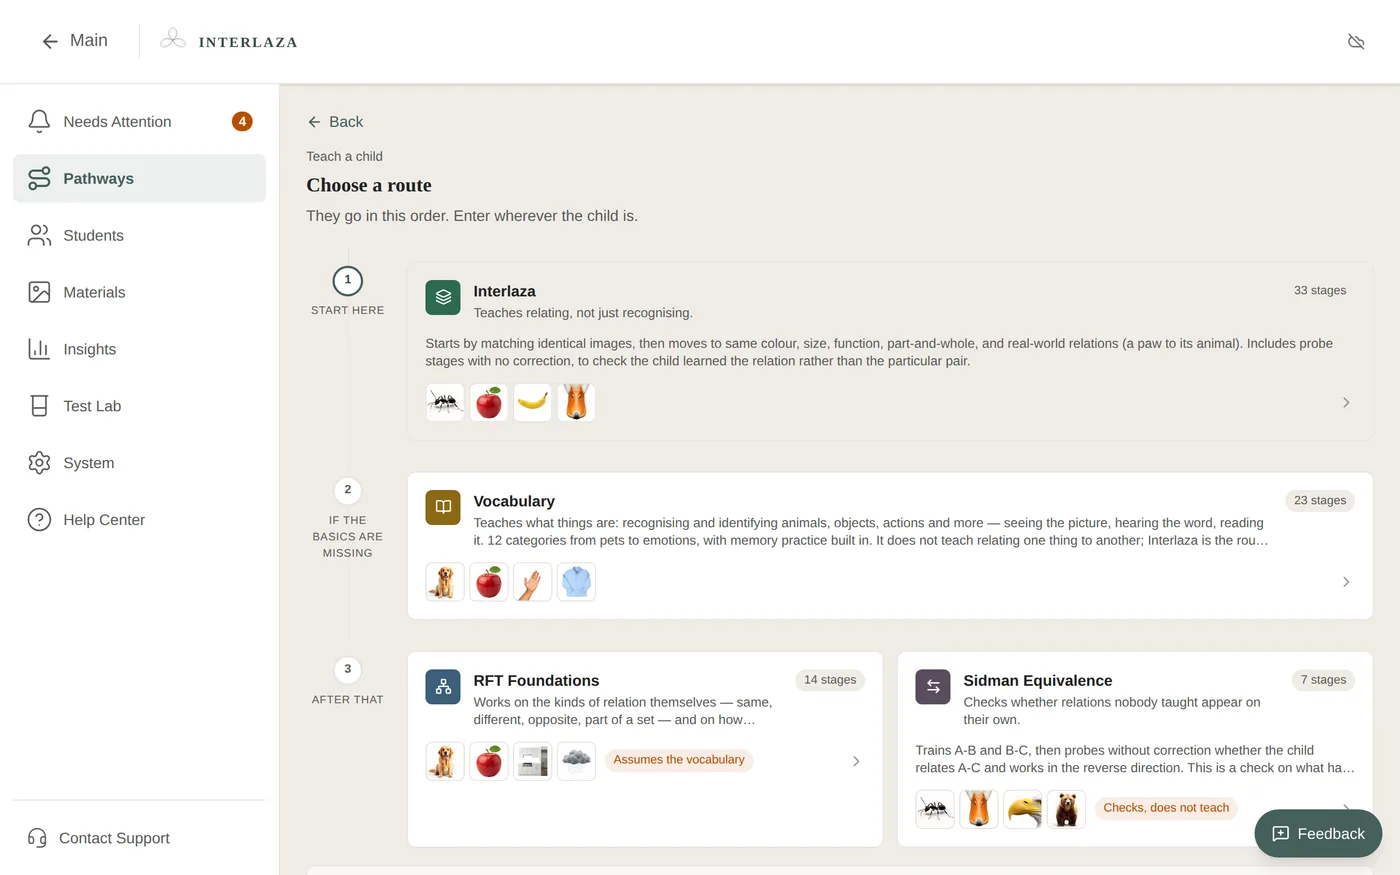
Avoid opening with a large curriculum simply because it is available. A small, interpretable result is a better start than broad exposure with no clear decision attached.
Once a route fits the question, Assign to student, then check the learner’s readiness and entry point before you Start Practice.
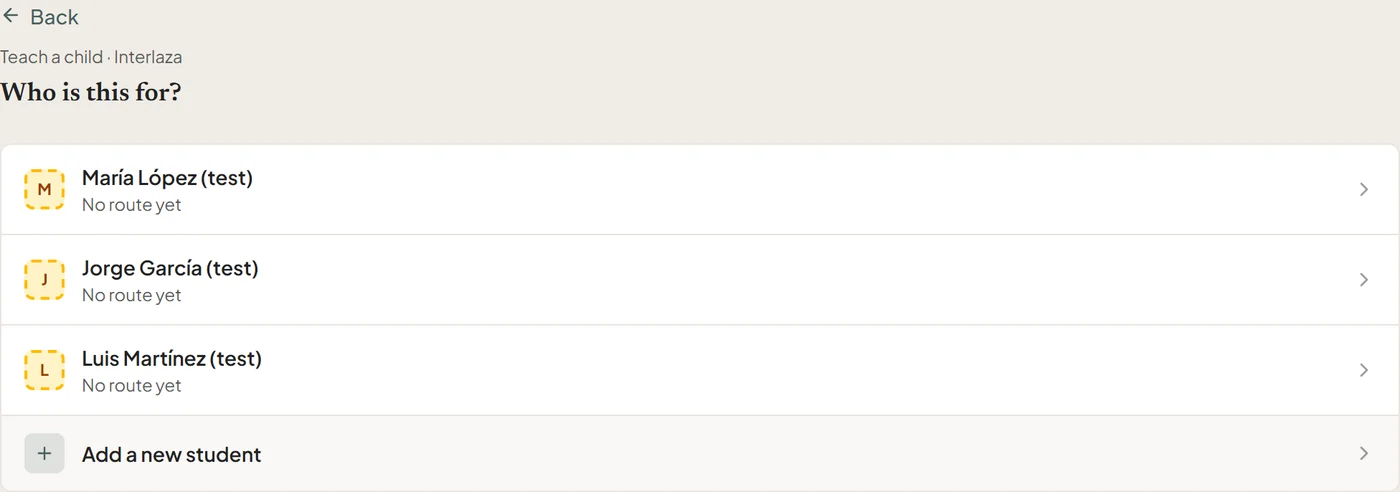
- Choose a route
- Select the student
- Review the starting point before practice
4. Run a preflight before the learner arrives
For tablet work, check:
- the device is in a comfortable landscape position;
- targets are large enough and nothing important sits under a system bar;
- sound is appropriate for the learner and the room;
- the activity is available locally if the connection may be unreliable;
- the chosen celebration and interaction settings match the profile.
For off-tablet work, prepare cards, objects or preferred items and place the recording device where the Instructor can score without losing the learner.
5. Keep the first session deliberately short
Observe whether the learner understands the response format, whether the prompt hierarchy fits and whether the environment supports participation. Stop if continuing would mostly measure fatigue, access difficulty or escape from an unpleasant setting.
Interlaza can record a brief session. It cannot make a poorly timed session more representative by adding trials.
6. Read the result at the right level
Afterwards, open the learner’s Results tab and ask:
- Which responses were independent?
- Which required support, and did that support fade?
- Did errors cluster by target, position or moment in the session?
- Was the procedure delivered as planned?
- Is there enough evidence to make a decision, or only enough to plan the next check?
A first session can justify changing the setup or choosing a prerequisite. It rarely justifies a broad claim that a skill is learned.
The product should make the second session easier
The value of Interlaza appears when the record carries the answer forward: the next stage is clearer, the materials are already organized and the Instructor does not reconstruct the previous session from memory.
That is the right first win — not having explored the whole app, but knowing what happened, what it means and what to do next.